
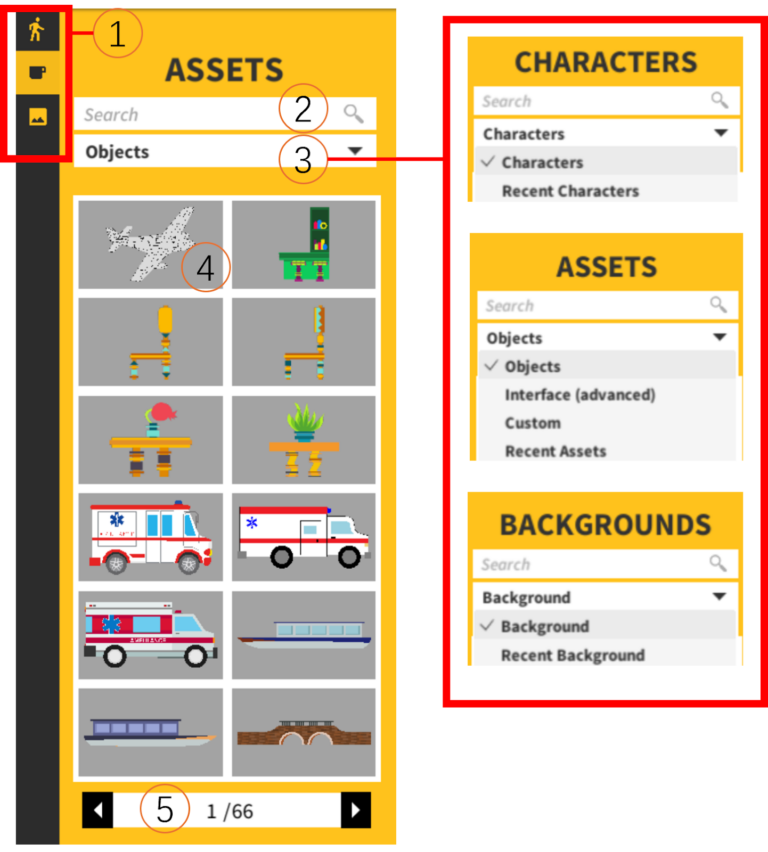
As shown in Figure 3, the object tabs consists of 5 parts:
- (1) Tab indicator: you can click on the icons to switch between characters, assets, and background tabs.
- Characters tab : includes a variety of characters.
- Assets tab : includes a variety of items.
- Backgrounds tab : includes a variety of backgrounds.
- (2) Search bar: you can use keywords to search for the objects by keywords in the current object tab.
- (3) Subcategory dropdown menu: you can select the subcategory of the current object tab.
- <Tab Name>: display all objects the tab has.
- Recent <Tab Name>: display the recently used objects.
- [Assets tab] Interface (advanced): display the advanced objects that can be used to make user interfaces, including texts, buttons, and slide bars.
- [Assets tab] Custom: display the custom assets that you upload.
- (4) Objects: all objects in the subcategories will be displayed. you can left click the object to add it into the scene. The object will appear at the center of the scene. Or you can hold the left mouse button and drag the object to the place you want.
- (5) Pages: you can switch the pages to find more objects in the category.

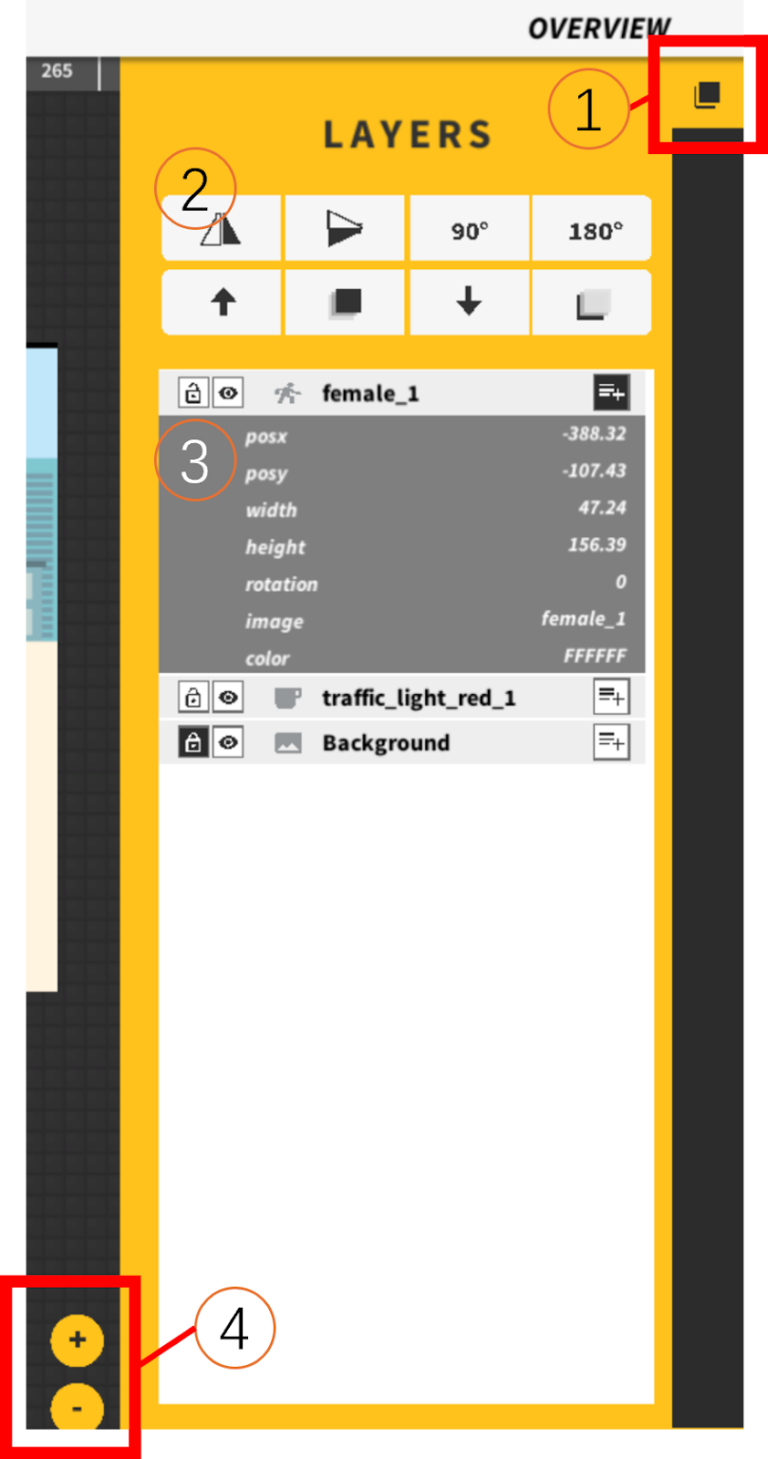
As shown in Figure 5, the layers tab consists of 4 parts:
- (1) Tab indicator: you can click on the icon to open or close the layers tab.
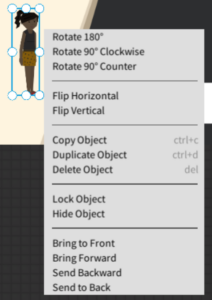
- (2) Object adjustment shortcuts: you can apply quick adjustments by clicking on the shortcuts. Hovering over the shortcut will display an explanatory text nearby, elucidating the shortcut’s function. The adjustment will be applied to the selected object.
- : flip the object horizontally.
- : flip the object vertically.
- : rotate the object 90 degrees in clockwise direction.
- : rotate the object 180 degrees.
- : move the object forward.
- : move the object to the front.
- : move the object backward.
- : move the object to the back.
- (3) Object list: it lists all objects in the current scene. For each objects, you can apply the following operations by clicking the corresponding icon:
- : click to select the object. If it is black, the object is selected. This has the same effect as clicking on the object in the scene.
- : click to lock the object to prevent accidental modifications.
- /: click to set the visibility of the object.
- : click to view detailed attributes of the object.
- (4) Zoom handles: You can zoom in and out the scene display.

Q1. How can I insert text in StudyCrafter?
First, open the Object Tabs, then click to open the Assets tab. Next, click on the Subcategory dropdown menu to find the Interface (Advanced) tab, where you will see the “Text” element as the first asset. After clicking or dragging the “Text” element into the scene, you can double-click it to edit the text.
Q2. How can I create a button in StudyCrafter?
You can turn any object into a button by selecting the “Object Choice” type under “Player Choice” in the Scriptor tab. Check the “Player Choice” in Onboarding for more information.
Q3. Where can I find my custom assets?
First, open the Object Tabs, then click to open the Assets tab. Next, click on the Subcategory dropdown menu to find the Custom tab, where you will see all your custom images.
Q4. How can I upload my custom assets?
Please check “Upload Custom Assets” in Onboarding.
Q5. Why are my custom assets white boxes when I add them into the scene?
Please use a proper username when naming assets. The name should not contain any special characters or spaces.
Q6. How can I create a timer/HP bar in StudyCrafter?
Use the Meter object to create a timer or HP bar. Adjust its value using Action nodes or Set Variable nodes. For more details, refer to the “Action” and “Set Variable” in Onboarding.